
Beger Wood Filler เบเยอร์ วูดฟิลเลอร์
| หมวดหมู่ | สีรองพื้น (PRIMER) |
| ราคา | 315.00 บาท |
| ขนาด | 1 GL |
| สถานะสินค้า | พร้อมส่ง |
| อัพเดทล่าสุด | 22 ส.ค. 2568 |
| จำนวน | Can |
หยิบลงตะกร้า

รายละเอียดสินค้า
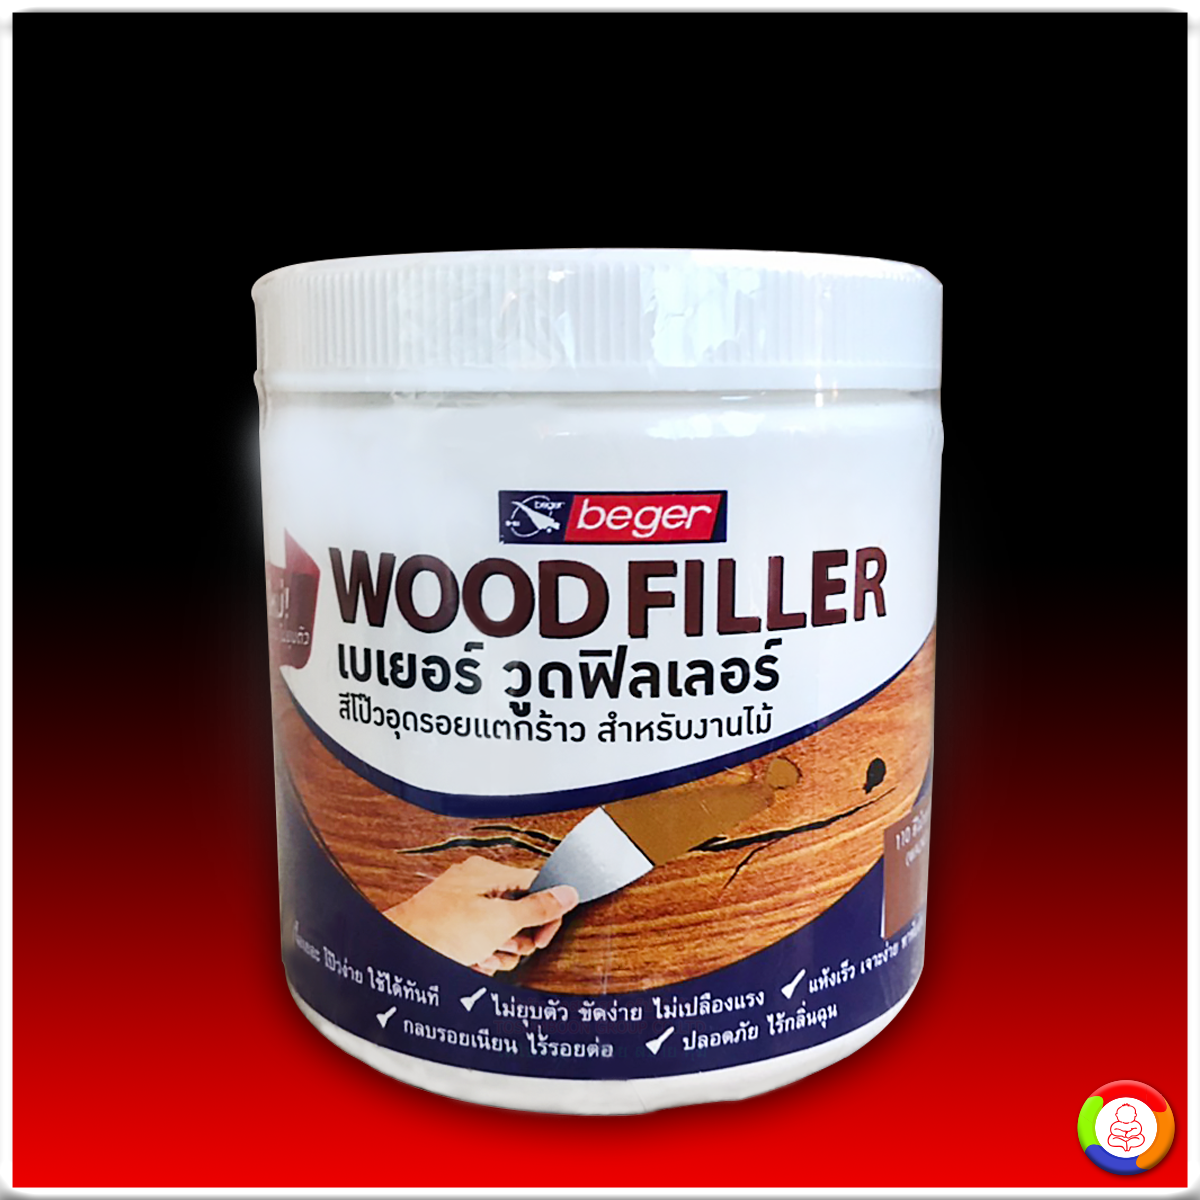
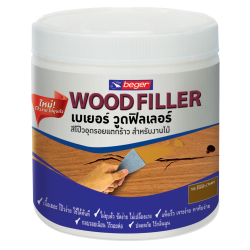
Beger Wood Filler
เบเยอร์ วูดฟิลเลอร์
Beger Wood Filler
เบเยอร์ วูด ฟิลเลอร์
สีโป๊วไม้สำหรับอุดโป๊วรอยแตกของร่องไม้ รอยหัวตะปู สูตรสำเร็จ ไม่ต้องผสมดินสอพองหรือแต่งสีให้ยุ่งยาก ผลิตภัณฑ์ตกแต่งผิว ใช้สำหรับโป๊วไม้ อุดรอยแตกและรอยหัวตะปู หรือรอยชำรุดของไม้ทั้งภายนอกและภายใน สูตรสำเร็จพร้อมใช้ ไม่ต้องผสมดินสองพอง น้ำ น้ำมันสน หรือแต่งสีให้ยุ่งยาก ใช้งานง่ายเพียงตักออกจากภาชนะบรรจุแล้วนวดให้เข้ากัน ให้การยึดเกาะดีเยี่ยม ไม่แตกร้าว ไม่หลุดล่อน แห้งเร็ว ขัดง่าย เรียบเนียน ไม่ยุบตัว ไม่เป็นคราบฝังติดเนื้อไม้ เจาะได้ เลื่อยได้ ทาสีทับได้ สามารถผสมเฉดสีต่างๆ เข้าด้วยกันได้คุณสมบัติ :
ขนาดบรรจุ : 500 กรัม
คุณสมบัติ :
- อุดโป๊ว ซ่อมรอยแตก รอยห่าง รอยหัวตะปู หรือรอยชำรุดของไม้ทั้งภายในและภายนอก
- ใช้งานง่าย เพียงตักออกจากภาชนะบรรจุแล้วนวดให้เข้ากัน
- ยึดเกาะดีเยี่ยม ไม่แตกร้าว ไม่หลุดล่อน
- แห้งเร็ว ขัดง่าย เรียบเนียน ไม่ยุบตัว
- ไม่เป็นคราบฝังติดเนื้อไม้
- เจาะได้ เลื่อยได้ ทาสีทับได้
- มี 4 เฉดสีให้เลือก ได้แก่ สีไม้สัก สีไม้มะฮ็อกกานี สีไม้วอลนัท และสีไม้สน
ระบบการทาสี
- ขั้นที่ 1 การเตรียมพื้นผิว
-
- 1.กรณีไม้เคยทาสีมาก่อนและฟิล์มสีลอกล่อน หรือ เป็นไม้เก่าที่ไม่เคยทำสีมาก่อน ให้ขัดด้วยกระดาษทรายจนถึงเนื้อไม้เดิม ถ้าเป็นไม้ใหม่ให้ขัดเพื่อขจัดเสี้ยนไม้ส่วนเกิน แล้วทำความสะอาด พื้นผิวให้ปราศจากคราบไขมัน ฝุ่น น้ำมัน หรือสิ่งแปลกปลอม
- 2.กรณีที่ไม้มียาง ควรเช็ดทำความสะอาดยางไม้ด้วย ทินเนอร์ M – 77
- 3.เลือกเฉดสีของเบเยอร์ วูดฟิลเลอร์ให้เข้ากับสีไม้หรือสีที่จะทาทับ
- 4.ตักแบ่ง วูดฟิลเลอร์ในปริมาณที่ใช้แล้วนวดให้เข้ากัน
- 5.ใช้เกรียงโป๊วปาดให้สูงกว่าพื้นผิวเล็กน้อยเพื่อขัดกระดาษทราย ถ้าโป๊วรูลึกควรโป๊ว เป็นชั้นไม่เกิน 5 มิลลิเมตร และควรรอให้ชั้นแรกแห้งสนิทก่อนโป๊วทับในชั้นต่อไป จากนั้นทิ้งไว้ประมาณ 30 นาที ขัดแต่งด้วยกระดาษทรายและทำความสะอาด
- 6.เมื่อแห้งสนิท สามารถเลื่อย เจาะ ตอกตะปู หรือทาสีทับได้ตามต้องการ
- 7.ทำความสะอาดเครื่องมือก่อนแห้งสนิท ด้วยน้ำสะอาด
 |
 |
*** สามารถติดต่อสอบถาม 083-2393626 , 083-2396466 หรือ LINE : @TOPAINTS ***
ราคาขึ้นอยู่กับเฉดสีแต่ละเฉด โปรดเลือกเฉดที่ต้องการ ได้ที่แคตตาล็อกด้านบน
เงื่อนไขอื่นๆ
Beger Wood Filler
Feature :Wood putty for filling cracks of wood grooves, nail marks. Ready formula. No need to mix chalk or complicated colors. skin care products used for wood putty Filling cracks and nail marks or damage of wood both outside and inside Ready-to-use formula No need to mix two puffs of clay, water, turpentine, or complicated coloring. Easy to use, just scoop it out of the container and knead well. Provides excellent adhesion, does not crack, does not peel off, dries quickly, is easy to scrub, is smooth, does not collapse, is not stained with wood, can be drilled, can be sawn, can be painted over, can mix various shades can get together
Putty, repair cracks, gaps, nail head marks or damaged wood, both inside and outside. Easy to use. Just scoop out of the container and knead well. Excellent adhesion, no cracks, no peeling, fast drying, easy to scrub, smooth, not collapsing, no stains embedded in the wood, can be drilled, can be sawn, can be painted over. There are 4 shades to choose from: Teak, Mahogany, Wood. Walnut and pine color
Product use process
Step 1 Surface Preparation
- 1.In case the wood has been painted before and the paint film peels off, or it is an old wood that has never been painted before. To sand with sandpaper until the original wood. If it's new wood, sand it to remove excess wood burrs. then clean The surface is free from grease, dust, oil or foreign matter.
- 2.Should be wiped clean with thinner M-77.
- 3.Choose the shade of Beyer. Wood filler to match the color of the wood or color to be applied over it.
- 4.Dividing the amount of wood filler used and kneading them together.
- 5. Use a notched trowel to spread slightly higher than the surface to sand paper If putty has deep holes, it should be putty. a layer of not more than 5 mm and should wait for the first layer to dry completely before putting on the next
- 6.When completely dry, can be sawed, drilled, nailed or painted over as needed.
- 7.Clean the tool before it is completely dry with clean water.
|
|
*** สามารถติดต่อสอบถาม 083-2393626 , 083-2396466 หรือ LINE : @TOPAINTS ***
ราคาขึ้นอยู่กับเฉดสีแต่ละเฉด โปรดเลือกเฉดที่ต้องการ ได้ที่แคตตาล็อกด้านบน
วิธีการชำระเงิน
เงื่อนไข:
- โอนเงินก่อนส่งสินค้า T/T 100% ผ่านหมายเลขบัญชี แล้วแจ้งหลักฐานการโอน ผ่านขั้นตอนหน้าเว็บไซด์ หรือ LINE หรือ E-mail
การจัดส่งสินค้าหลังจากลูกค้าชำระเงินเพื่อเปิดออเดอร์แล้ว ทางร้านจะจัดส่งสินค้าภายใน 1-3 วันทำการ
เงื่อนไขการจัดส่ง :
ยอดเกิน 4,000 บาท ส่งฟรีในเขต กรุงเทพมหานคร
ยอดเกิน 6,000 บาท ส่งฟรีภายในเขต นนทบุรีตอนล่าง
ยอดเกิน 8,000 บาท ส่งฟรีภายในเขต นนทบุรีตอนบน
***กรณียอดสั่งซื้อไม่ถึง 4,000 บาท มีค่าจัดส่ง 200
- กรณีส่งผ่านขนส่งไปต่างจังหวัด คิดค่าจัดส่งตามกล่อง 150/กล่อง
ชำระเงินผ่านธนาคาร


 |
 |
 |
 |
 |
โตเพ้นท์ ขอขอบพระคุณลูกค้าทุกท่านที่ให้โอกาส เราได้เป็นสีสันส่วนหนึ่งของคุณ
เราขอให้คำมั่นสัญญาว่า " โตไปด้วยกัน ง่าย สบาย คุ้ม "
เราขอให้คำมั่นสัญญาว่า " โตไปด้วยกัน ง่าย สบาย คุ้ม "
| เยี่ยมชมเว็บไซต์ |
|||||||
 |
 |
 |
 |
 |
 |
 |
 |
 |
 |
 |
 |
 |
 |
 |
 |
▲
▼
รายการสั่งซื้อของฉัน
รายการสั่งซื้อของฉัน
ข้อมูลร้านค้านี้

โตเพ้นท์
เราคือผู้จัดจำหน่ายสีแบรนด์ชั้นนำเช่น TOA CHOGOKU JOTUN KANSAI ฯลฯ สิ่งที่เราคำนึงถึงมากที่สุดคือ คุณภาพ ของแท้ จากโรงงาน ความรวดเร็วในการดำเนินงาน ตลอดจนความพอใจของลูกค้า ภายใต้ราคาที่ถูกกว่าท้องตลาดทั่วไป เราจัดจำหน่ายสินค้าถูกต้องตามกฏหมาย เราพร้อมที่จะให้คำปรึกษาแนะนำด้านผลิตภัณฑ์ เราบริการลูกค้าไม่ว่าจะซื้อจำนวนมากหรือน้อย เรายินดีให้บริการค่ะ สำหรับลุกค้าที่ซื้อจำนวนมาก สามารถคุยราคาพิเศษได้ค่ะ เรามุ่งเน้นที่จะเป็นร้านค้าออนไลน์ที่มีความน่าเชื่อถือและมีสินค้าจำหน่าย ในราคาที่เหมาะสมที่สุด สินค้าของเรา เป็นสินค้าที่มีคุณภาพสูงเมื่อเทียบกับราคา มั่นใจได้ในระบบคุณภาพ RoHS, CE และ ISO9001 ที่ยอมรับทั่วโลก โตเพ้นท์ รับงานทาสี ,รับงาน hifloor, รับงานปูกระเบื้อง โดยช่างมืออาชีพ
เบอร์โทร : 083-2393626
อีเมล : topaints@gmail.com
อีเมล : topaints@gmail.com
ส่งข้อความติดต่อร้าน
เกี่ยวกับร้านค้านี้
ค้นหาสินค้าในร้านนี้
ค้นหาสินค้า
สินค้าที่ดูล่าสุด
บันทึกเป็นร้านโปรด
Join เป็นสมาชิกร้าน
แชร์หน้านี้
แชร์หน้านี้
↑
TOP เลื่อนขึ้นบนสุด
TOP เลื่อนขึ้นบนสุด
สินค้าในตะกร้า ({{total_num}} รายการ)

ขออภัย ขณะนี้ยังไม่มีสินค้าในตะกร้า
ราคาสินค้าทั้งหมด
฿ {{price_format(total_price)}}
- ฿ {{price_format(discount.price)}}
ราคาสินค้าทั้งหมด
{{total_quantity}} ชิ้น
฿ {{price_format(after_product_price)}}
ราคาไม่รวมค่าจัดส่ง
➜ เลือกซื้อสินค้าเพิ่ม